Monday, July 15, 2013

Berry-Yogurt Popsicles

This can be made with whatever fruit you prefer. I used a frozen mixed berry, vanilla yogurt, and agave nectar. I found the popsicle forms at the dollar store -can't beat that! It made a very tasty and refreshing summer treat.

(makes 8 popsicles)

Ingredients and Materials
16 oz. fruit, either fresh or thawed
8 oz. yogurt, whatever flavor you prefer
2 Tbs. sweetener (optional)

Steps
1. Puree the fruit using a food processor or immersion blender.
2. Add your sweetener and yogurt.
3. Blend until very smooth.
4. Spoon into your popsicle forms, freeze, and wait a few hours until done.


Thursday, July 4, 2013

Maryland Flag Birdhouse

This is a birthday gift for our father-in-law that I spent the day making. I wanted to make him something unique and interesting. I thought painting the Maryland flag on the roof of a birdhouse would look cool. Both my husband and I graduated from the University of Maryland so I thought this would be a nifty gift. This took several hours to make. In particular it took a lot of trial error and repainting the roof because as it turns out the Maryland flag is quite complicated to draw. It isn't perfect, but its still pretty cool and I am really proud of it.


Wednesday, July 3, 2013

Butterfly Ombre Heart Tutorial

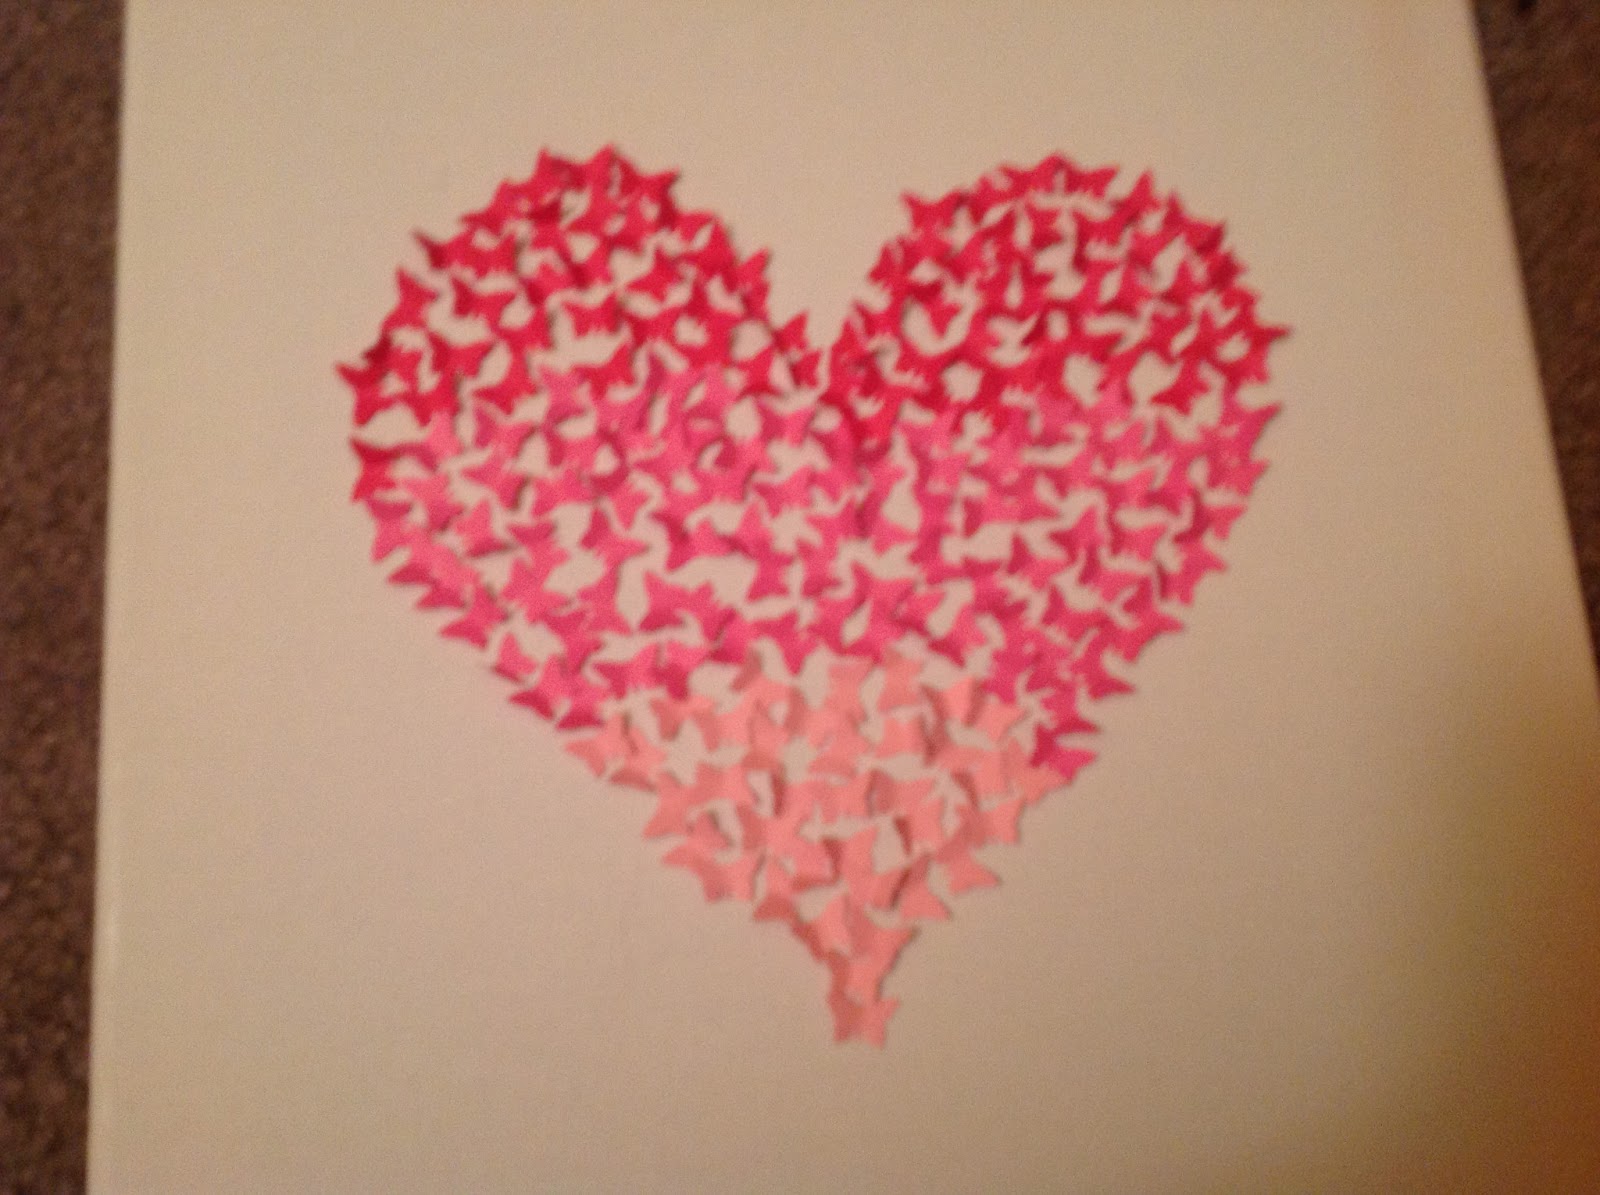
This is my twist on the Butterfly Ombre Heart Picture that I have seen. Be forewarned this is a very time consuming project and it took me several hours to make. It requires a lot of attention to detail, but is really cute when its done!

Materials Needed:
1 canvas (I chose a 12x12 canvas)
Cardstock in 3 different shades of the color of your choice
Butterfly hole punch
Hot glue gun and glue

Directions:
1. Hole punch your butterflies. It took me one sheet of each color. Then bend each individual butterfly almost in half.

2. Then rearrange each butterfly into a heart shape outline. At this point, just try to get the shape of the heart down right.

3. Once you have the heart shape right, then begin filling in the hear with the butterflies. Start turning the butterflies in a haphazard direction, this will make them look more realistic. The idea is to not make the butterflies look too uniform.

4. Next, scatter about the butterflies on one side to make it look like they are either flying away or landing.  Place a few extra butterflies around the heart to make it look like they are flying on the canvas.

5. Once you have your design perfect, begin the process of gluing each of the individual butterflies down.


Summer Initial Wreath

I have seen these pics pop up all over the internet and I decided that instead of buying one, I would try and make one on my own. I decided to go with my favorite colors turquoise blue and hot pink.

Materials Needed:
Hot Glue Gun
Gluesticks
3 of your favorite artificial flowers
Paint
Wooden Letter
Wood/Stick Wreath

Directions:
1. Paint the wooden letter in the color of your choice. I chose aqua blue because it accented the hot pink flowers and the turquoise flower really well. I also tried really hard to make the letter with pink polka dots on it, but that really didn't work. I decided one single color would be best.

2. remove the buds of the flowers from the stems and glue them down to the wreath. I decided to do one blue and two pinks to maintain balance. You can make the two flowers in the same color either the same size as your focal point flower or you can make them a little smaller to accent the larger flower.

3. Once dry, glue the painted letter to the other side of your wreath. Make sure it is secured well.

There you have it 3 easy steps and you have a cute summer wreath for your door!